
How I built my own Gaming PC
- Lela Star

- May 28, 2021
- 18 min read
How I built my own Gaming PC
By Lela S.

Yes, you read the title correctly. This article will be all about how I built my own gaming computer during March break, and how you can build your own as well!
At the end of February, I signed up for a class on Outschool which taught me the basics of building a gaming computer. If you don’t know what Outschool is, it’s a platform where you can take courses on lots of different subjects at outschool.com. The course is called “How to Easily Build a Gaming Computer Cheaply” by Mason McDaniel, and here’s the link:
This course was pretty helpful. I learned about the parts that you needed to build a gaming computer, plus a general idea about how to assemble it. However, I didn’t have much experience with the subject. Soon, though, the pieces would start to click into place.
During March break, this was the project I really wanted to do. Over the course of a few days, I did some research. All my research was gathered up in a Google Doc. Here are the main websites I used in my research:
https://www.canadacomputers.com/ - Canada Computers
Here, I purchased most of the components to build it
https://www.userbenchmark.com/ - User Benchmark
This website helped me compare the different components to see which one is more suited for my PC
https://www.systemrequirementslab.com/cyri - Can I Run It (recommended to me by “How to Easily Build a Gaming Computer Cheaply” by Mason McDaniel)
I enter the name of a video game, and it tells me what system requirements are needed to build it
To start, I needed to know which components I needed to look for to build the gaming PC. I already had a vague knowledge of it, from the Outschool class, but I still had a lot to learn. From what I learned, here are the parts I needed:
Case
Power Supply
Monitor
Motherboard
CPU
RAM (Memory)
SSD
Video Card/Graphics Card
Keyboard
Mouse
Now, this list of parts is practically meaningless if you don’t know what each of these parts do. Because of this, I had to do some basic research about each main part of the PC. Suddenly, all the foreign vocabulary I heard in the class started to click in my head and made sense.
1. Case
The case is pretty self-explanatory. It holds all the parts that make up the gaming PC, and it keeps them really organized and held into place. They come in lots of different sizes.
2. Power Supply
The power supply distributes power to all of the elements used to make it. It’s wired to different outlets in the motherboard to give everything else power to run.
3. Monitor
The monitor is the display for the computer, or the screen.
4. Motherboard
Whew! Now, we are actually going to start on the INTERESTING STUFF. The motherboard is the powerhouse of the whole device. Notice how I said device, not computer, because you can find a motherboard in every device you own, even your phone! It is the main part of the device: it allows all the parts to talk to each other and communicate. Without the motherboard, none of the other parts would even come close to functioning. It’s the backbone of the computer.
5. CPU
I said that the backbone of the computer is the motherboard. If we continue using the same context, we could say that the CPU is the brain. CPU stands for Central Processing Unit, and it does all the heavy lifting. Basically, it converts 1s and 0s, or binary code, to an interface all of us understand. It sits in a slot inside the motherboard.
6. RAM (Memory)
RAM, or Random Access Memory, is the short-term memory of the device! It gives applications a place to store their data on a short-term basis. The more programs your system is running, the more you’ll need.
7. SSD
SSD, or the Solid State Drive, is like a hard drive. Don’t know what a hard drive is? Well, there are important differences in the technology hard drives and SSDs use, but they both serve the same purpose: long-term memory. Examples of this would be files and applications. SSDs use flash memory to store data, which is accessed digitally. A hard disk drive (HDD) uses a spinning platter and an arm that moves across the platter to read each portion of data. Because of this, SSDs are faster and can read data almost instantly.
8. Video Card/Graphics Card
How does the video card work? Well, at most common resolution settings, a screen displays over a million pixels, which are the little squares that make up your screen, and the computer has to decide what to do with every one in order to create an image. That’s the job of the video card, which connects with the CPU to create the graphics you see on your screen.
9. Keyboard
I think you know EXACTLY WHAT A KEYBOARD IS. But I’ll still explain it anyway. Every computer has a keyboard, where you can type text that will appear on the screen with the help of the video card.
10. Mouse
*sigh* The mouse allows you to navigate the screen. Using your cursor, which is controlled by the mouse, you can click on different places on your screen.
Using the website Can I Run It, I looked at the system requirements of the games I wanted to play. I had three games in mind: Minecraft, Fortnite and Rust (I only play Minecraft, but I’m looking into the other two). Looking at the three games, I checked each of them out on the site, and looking at their recommended specs, Rust was by far the game that demanded the highest requirements.
Minecraft:
CPU: Intel Core i5-4690 3.5GHz / AMD A10-7800 APU 3.5 GHz or equivalent
CPU SPEED: Info
RAM: 4 GB
OS: Windows 10
VIDEO CARD: GeForce 700 Series or AMD Radeon Rx 200 Series (excluding integrated chipsets) with OpenGL 4.5
PIXEL SHADER: 5.0
VERTEX SHADER: 5.0
FREE DISK SPACE: 4 GB
DEDICATED VIDEO RAM: 256 MB
Fortnite
CPU: Core i5-7300U 3.5 GHz
RAM: 8 GB
OS: Windows 7/8/10 64-bit
VIDEO CARD: Nvidia GTX 660 or AMD Radeon HD 7870 equivalent DX11 GPU
PIXEL SHADER: 5.0
VERTEX SHADER: 5.0
DEDICATED VIDEO RAM: 2048 MB
Rust
CPU: Intel Core i7-4690K / AMD Ryzen 5 1600
CPU SPEED: Info
RAM: 16 GB
OS: Windows 10 64bit
VIDEO CARD: GTX 980 / AMD R9 Fury
PIXEL SHADER: 5.1
VERTEX SHADER: 5.1
FREE DISK SPACE: 12 GB
DEDICATED VIDEO RAM: 4096 MB
Actually, it might not be as obvious to you as it is to me. But anyway, this is why I decided to start with the requirements for Rust.

Building on what we had, on March 2, 2021, I started out my journey by going to the actual, real-life shop: Canada Computers. The motherboard we got was the Z490 Aorus Elite AC, which looks like this. It came inside that box, along with a long, detailed manual that really helped us assemble the whole thing.

Then, we decided to look for the video card. What we wanted to get was the GTX 980. However, we couldn’t find it anywhere. It wasn’t available in any store, online or real-life. So we had to compromise. The one we got wasn’t exactly the GTX 980, as we planned, but instead, we got the NVIDIA GT 1030. We decided to compare the two, and the results we found were that it wasn’t as good as the GTX 980. In fact, the GTX 980 was up to 200 percent better than the GT 1050 in almost every aspect, but it would have to do for then.

The next thing that I decided to choose was the RAM. I made the decision to start small, so we got two Aegis DDR4 memory sticks with 16 gigabytes each of storage (Later note: There are four slots to insert the memory sticks in, and we only had two, so we could add more if needed).

After that, I got the SSD, or Solid State Drive. It was a Western Digital NVMe SSD, and it had one terabyte of storage, which was a really significant amount! Looking at all the memory, short-term and long-term, we had 32 GB of RAM and 1 TB of SSD storage, which was actually pretty neat.

Then, I got the most important part of the computer: the CPU. From Intel, it was the i5-10400F LGA1200. Using a website called CPU User Benchmark, we looked at the i5-9400, and it was good enough. However, this was not available at Canada Computers, so we got the i5-10400F.
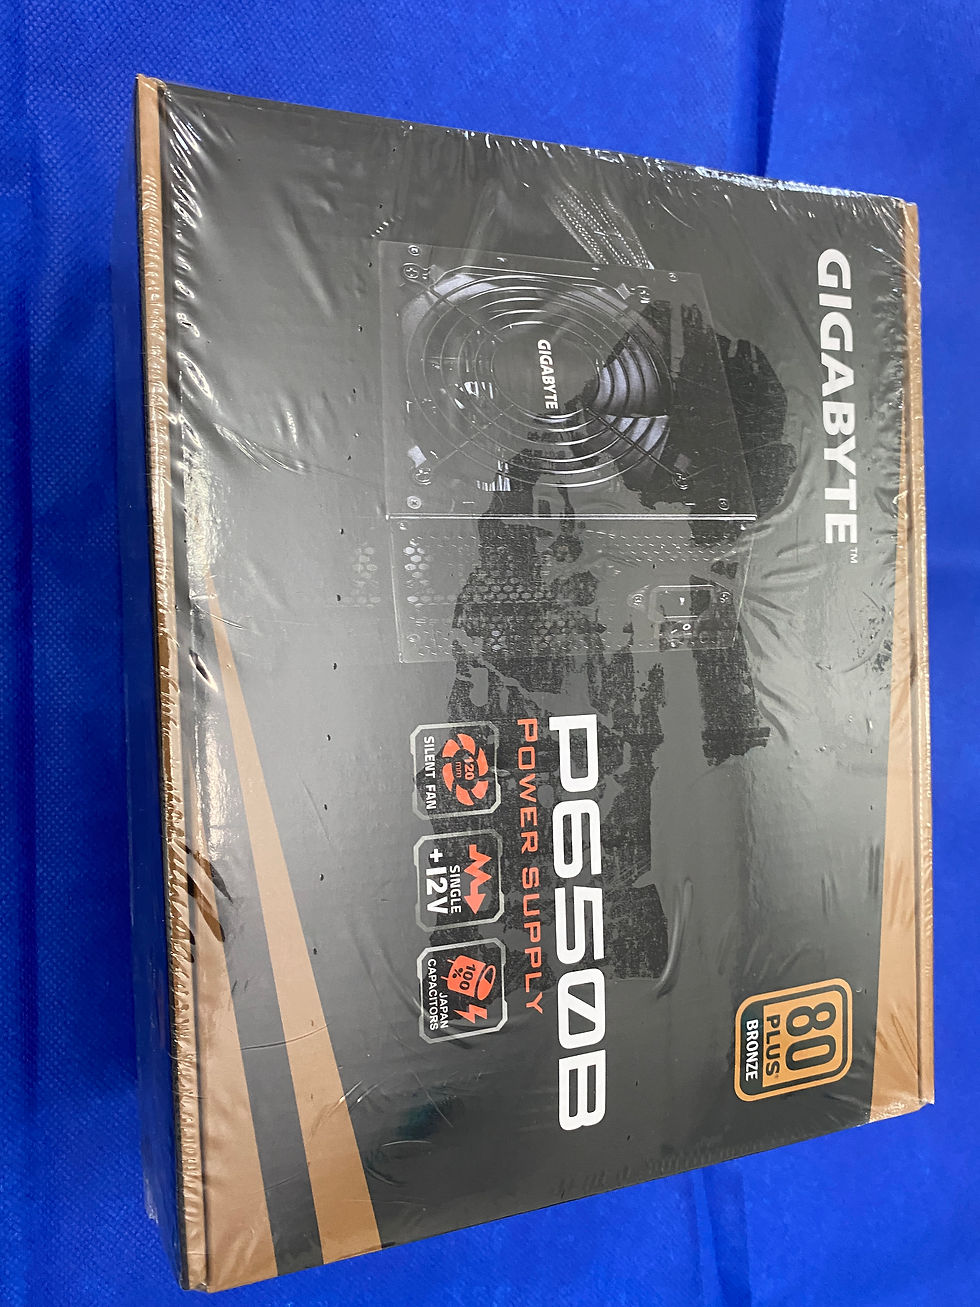
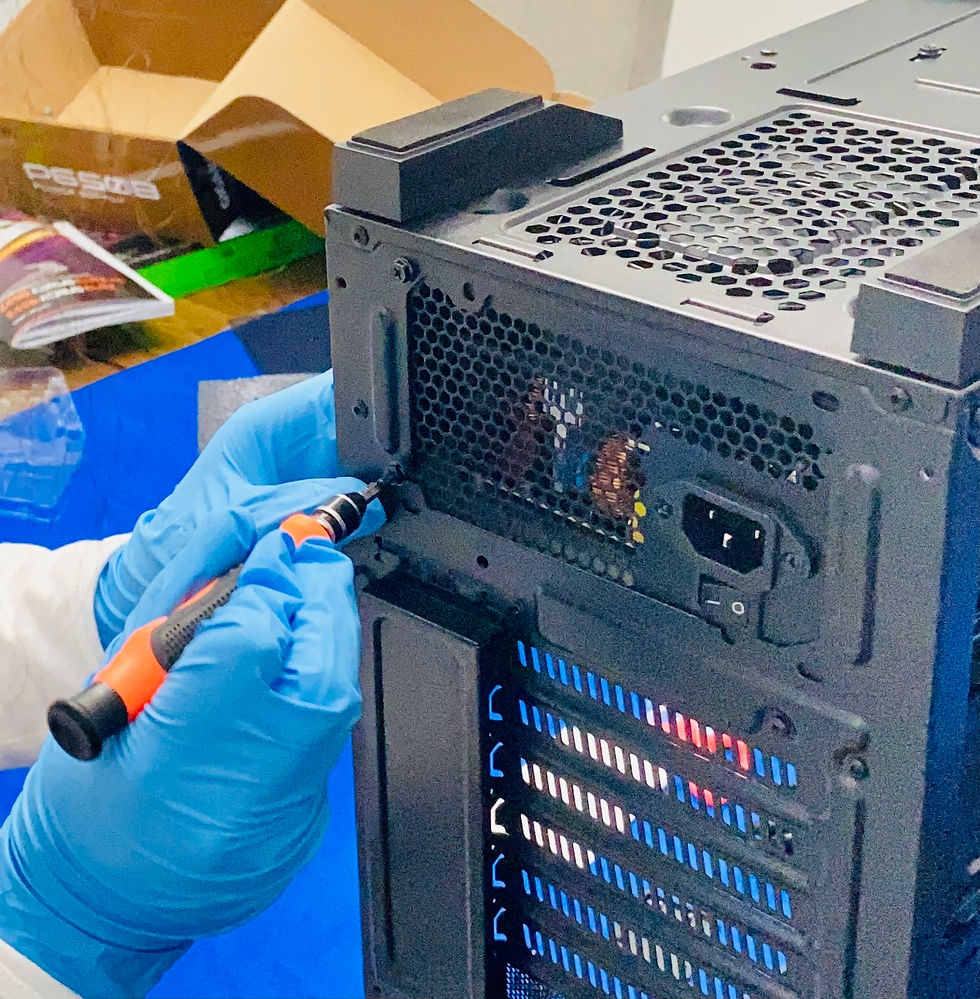
For the power supply, we needed one that was compatible with the motherboard, the Z490 Aorus Elite AC. The one that I found was the GIGABYTE™ P650B 12 volt power supply. It worked with the motherboard (as did every other part on the list).

Finally, we got a medium-sized case, called the MATREXX 50, that would fit all of the parts on the list. It came with four rainbow LED fans: three on the right and one on the left. It had a glass screen on one side where you could see the components on the inside, and the rest of the outer shell was made of black plastic or metal.
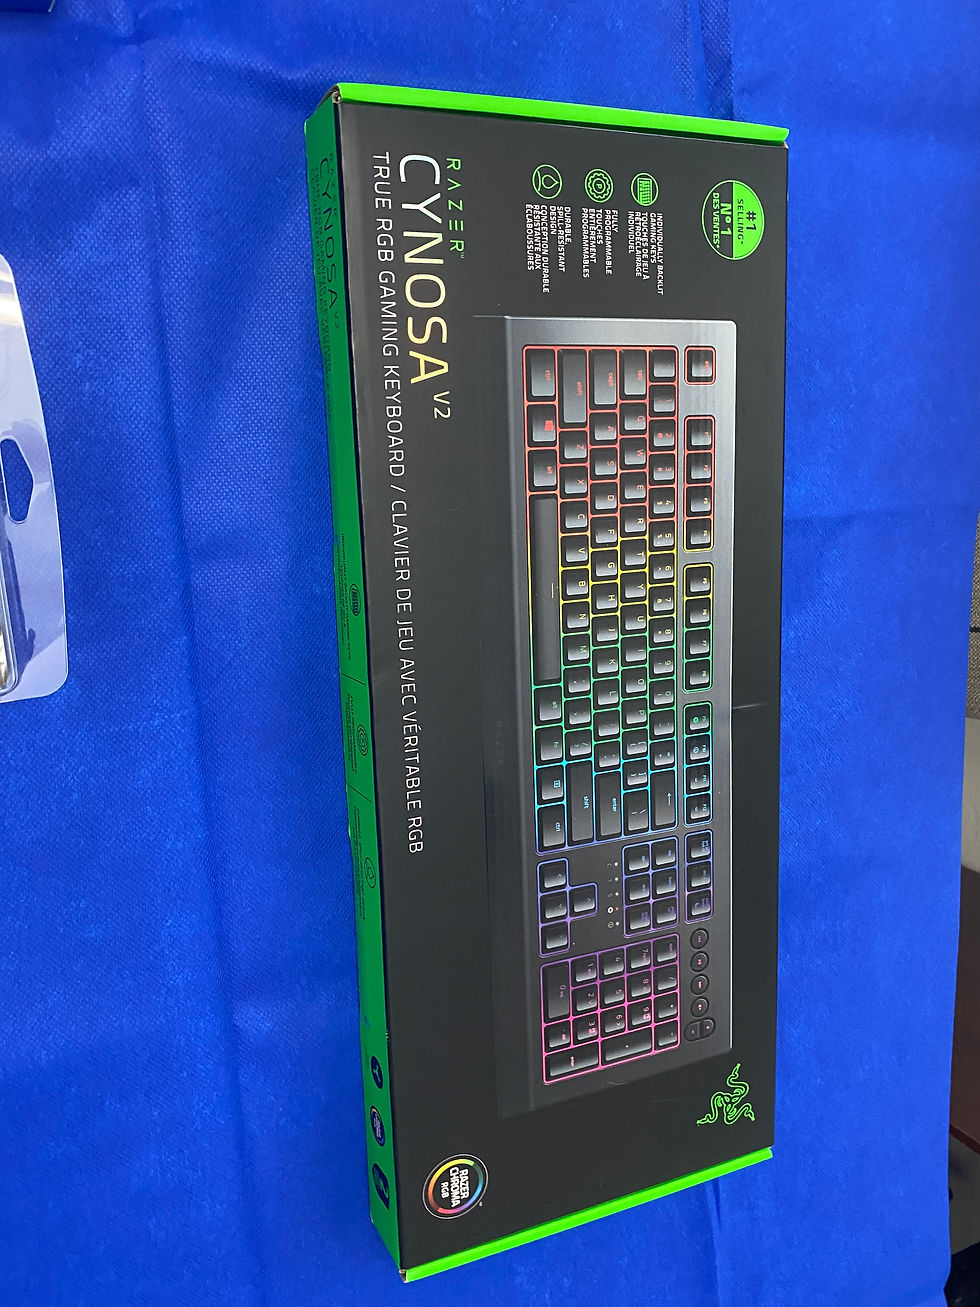
The next store we went to was Best Buy. There, we had to get some of the hardware that wasn’t available at Canada Computers. To start, I needed a keyboard. I had seen rainbow LED keyboards in some YouTube videos, and I wanted my own for my gaming PC. Previously, on Amazon, I had searched up some keyboards like that, and I had found the Razer Cynosa V2 Gaming Keyboard. So that was the one I got (I’m literally using it to type this *cough cough* really good article, so it has to be a good keyboard, right).

Before I left, I remembered one thing: the monitor. I purchased one that was called the VZ249 LCD Monitor, which was really big and fit perfectly on my new desk. I specifically chose this one, because at Canada Computers, this was the one with the clearest display. Upon further inspection, it actually had a blue light filter, which is good for my eyes, especially since I have glasses.
However, there was one thing I didn’t get for my PC, and that was the mouse. For the time being, I used my dad’s mouse, also from Razer.
As I went home, I was so excited. I couldn’t wait to build MY VERY OWN COMPUTER! It was going to be all mine. I knew that the experience would be so much fun. At that moment, I knew that I would write an amazing article about this.
Full Part List:
Z490 Aorus Elite AC Motherboard
NVIDIA GT 1030 Video Card
Aegis DDR4 16 GB RAM
Western Digital NVMe 1 TB SSD
Intel 10th Gen i5-10400F LGA1200 CPU
GIGABYTE™ P650B 12 Power Supply
MATREXX 50 Computer Case
Razer Cynosa V2 Gaming Keyboard
VZ249 LCD Monitor
Now, we get to the ASSEMBLY! The first thing I did was I decided to organise my material. First of all, I got all of the parts in their boxes onto my table, as well as a screwdriver. I followed up with mounting the monitor to my new desk. Along with that, I opened the manual which came with the motherboard. You can find it here:

Then, I tried to get the case out of the packaging. It was really heavy. If you’re my age and you are also building this, I warn you.

Looking at the case, I saw a few interesting things. However, I needed to remove the glass covering which prevented me from inspecting the case properly.
Once I could see the inside of the case properly, I noticed a few things. First of all, I could see the numerous fans. In the video, I’m pretty sure you only see one, but as I said before, there are actually three more on the other side. I also saw a power button and three USB slots, as well as one slot for headphones and another for a microphone, but they were unfortunately out of frame. As well as that, there were some air ventilation grates along the sides, which you can see in the video. The things that were the most obvious were the slots and holes where all the actual components of the PC were going to be placed. In my mind, I could visualize where every single piece would go. Well, almost, since this was my first PC.

To make it easier for me to assemble the computer, I had to not only remove the glass cover, but I also had to remove the metal back covering. This uncovered a lot more wiring. I mean A LOT MORE. The wire was all tangled. Apart from that, there was also some ventilation grates.

Inside the case, there was also a few packages containing… yep, you guessed it, MORE WIRES. I slowly and carefully unwrapped them, and took out the contents and placed them on the table.

The component that must be placed first is the motherboard. After a bit of unwrapping (warning: the parts are always really heavily wrapped, so they must be handled with caution), the motherboard was finally revealed.
On the motherboard, there are a few things that caught my eye. First, I saw a little slot near the center-right of the component, which was circled in red. Right away, almost instinctively, I knew that this slot belonged to the CPU.
Second, circled in yellow, there were four long slots that, from their long and thin shape, I assumed were to insert the RAM. I was right. However, I only had two memory sticks. Why were there four slots, then? Because I could add extra if I needed any more.
Third, as you might recognize, I saw a small, circular battery, which I decided to circle in green.
Fourth, circled in turquoise, there was one set of 2x2 pins and another set of 4x2 pins.. At the time, I didn’t know where I was supposed to connect them, but I would soon find out where they were supposed to go.

Fifth, circled in purple, you could see three connectors. These are supposed to connect to the power source. This might seem is almost guaranteed to be confusing at first. However, I promise that this will get a lot simpler in the future.

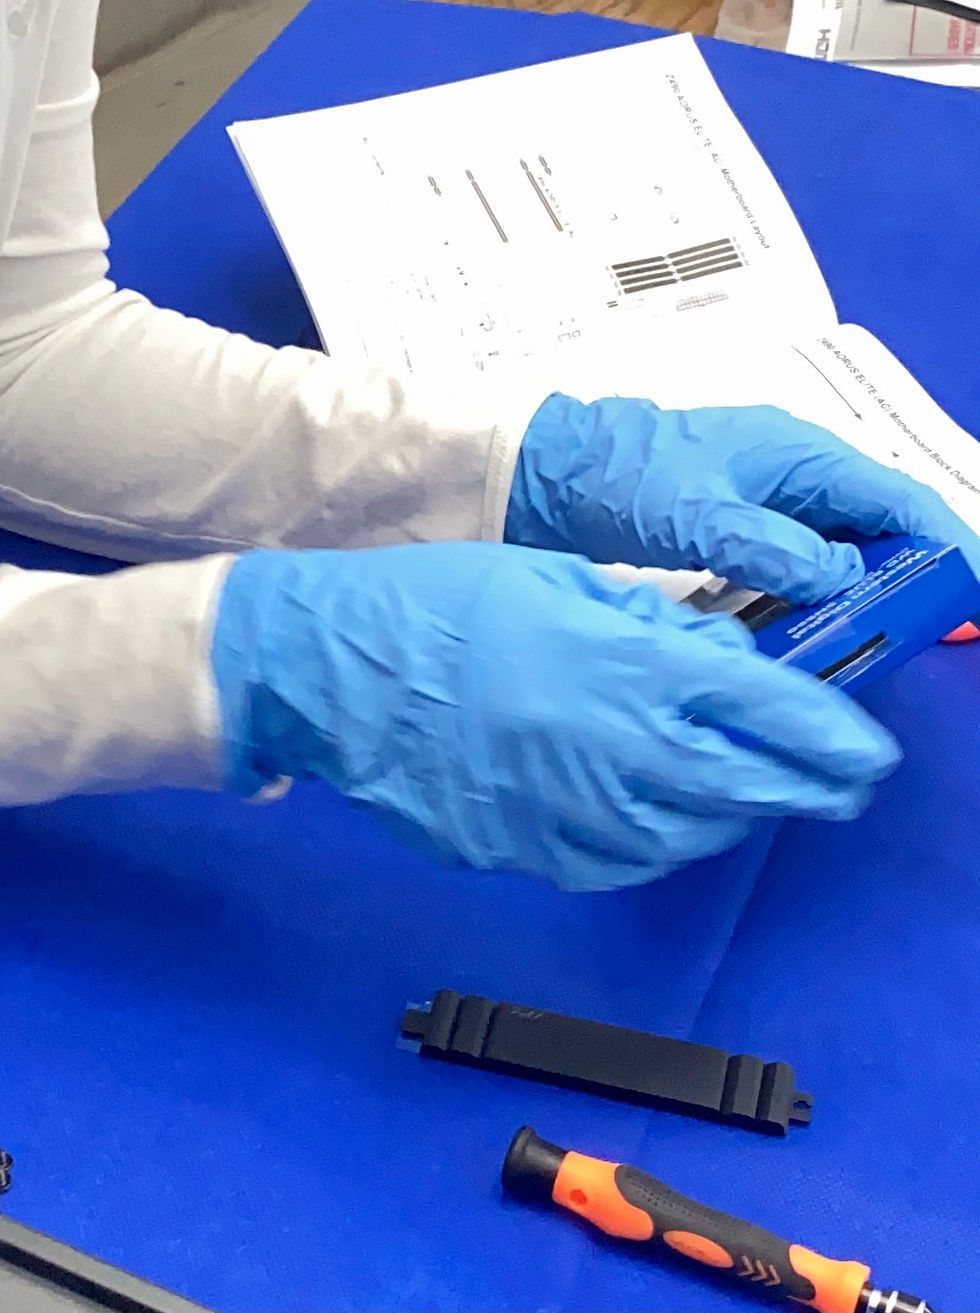
After I examined the motherboard thoroughly, I proceeded to unpack the CPU, which was packed in a lot of layers. First, there was a blue outer layer which you can see in the photo. Second, there were two more cardboard layers that protected it.
Inside the box, there was a gigantic fan that was supposed to dissipate the heat and cool down the CPU, and of course, the CPU itself, which was surprisingly different than what I thought it was supposed to be. It was a thin, silver rectangle that seemed less important than I thought it would look.

The next step was to screw the motherboard to the case. Using the screws that were provided inside the bags of wires and a screwdriver, I carefully screwed the motherboard to the case, making sure not to damage any of the other parts of the motherboard.

I don’t have a photo of me actually attaching the fan to the CPU, but I do have one of the final result. You can find it above.
As I looked closer at the CPU, I thought about it some more. The socket where it was supposed to be placed rang a bell. Suddenly, I remembered. Specifically, nearing the end of the class, the teacher, Mason McDaniel, had demonstrated exactly how to place the CPU. Using his explanation, I carefully inserted it into the slot.
Looking at the fan, there were some stray colored wires coming out of the fan, but I ignored them for the time being. In the photo, you can’t see it, but there was some grey gel called thermal paste, that was very sticky, between the fan and the CPU. It stuck to my gloves like crazy. But I knew it was going to transfer the heat from CPU to the heatsink fan, so it served a useful role.
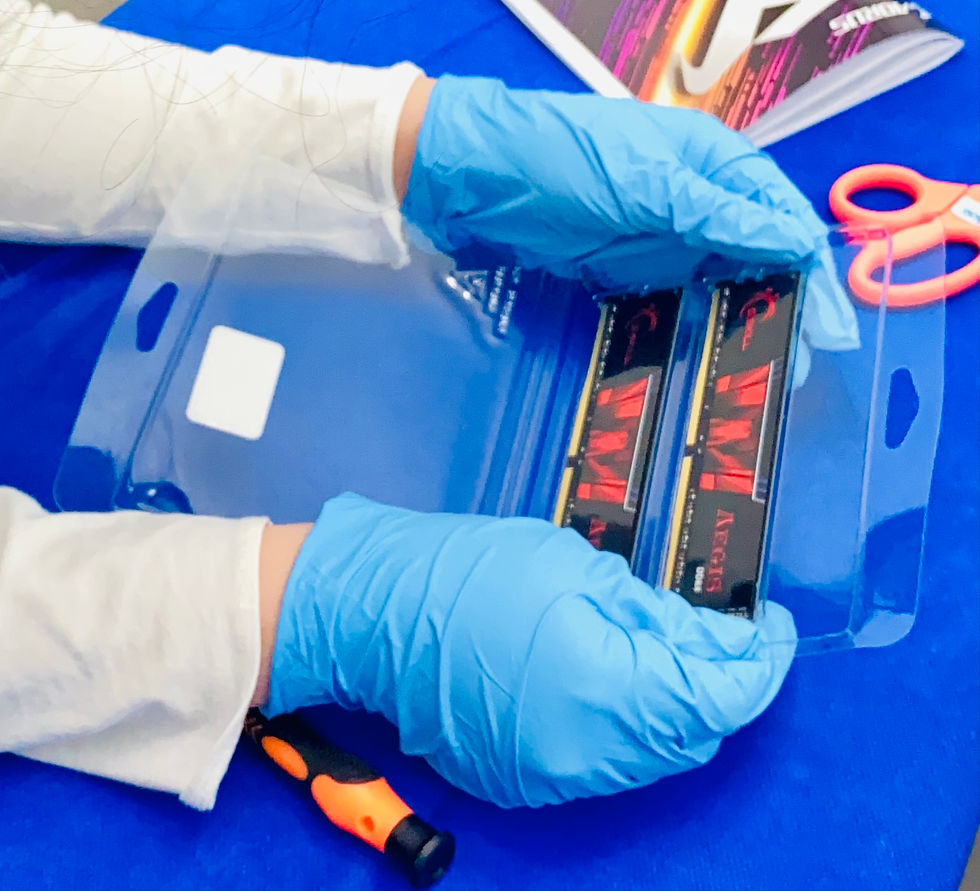
The next component I had to place was the RAM memory sticks. Like I said, they were long and thin, and there were only two of them. There were four slots, and I had to place them into their corresponding spots, leaving space for any extra memory sticks I could add later on. However, I didn’t know where to put them, so I decided to take a closer look.
I regret not taking as many pictures. I don’t have a picture to show you of the memory, but I’ll try to explain what it looked like. There were four long slots where I could insert the memory.

It’s not very clearly shown in this model, but the four slots were separated into two sections with two slots each in them. I had to place one memory stick in each section. At first, I had trouble inserting them, but after a few attempts, I heard a satisfying *click* sound, and from what I learned in the class, they were safely wedged in.

The next step was to add the SSD, or the Solid State Drive, which is basically, as I said before, the long-term memory. The first thing I had to do to install it was to unscrew the protective cover on top of the slot where I had to place it.
After that, I unwrapped the SSD, which was in a little blue box. It looked fragile and delicate, and it was the same thickness and size as the memory sticks.

I had to screw the SSD onto the motherboard after unwrapping it. The SSD looked really fragile, so I took extra care not to damage it as I was screwing it on. I removed the black covering using a small screwdriver, and I screwed on the SSD. Afterwards, I placed it back on, which according to the manual, is supposed to dissipate heat.

Next came the power supply. It was packaged really heavily. The first layer was a cardboard cover packaging, and the second one was a 1-INCH THICK layer of black foam. Along with the power supply, there were a bunch of really thick, colored cables all bunched together with as well as a mini manual.

The power supply itself was quite large, and it was supposed to be slid into the case from the outside. It had a fan on top, and there was a detail that I’d never noticed before: the thick cables were actually ATTACHED to the power supply.
Once the installation of the power supply was finished, I had to add the video card. To do so, I had to unscrew two of the vents on the case. This was so I could properly place the video card inside it.

Then, I actually had to UNWRAP the video card itself. It looked like a fan on top of a thick, navy blue cardstock. Don’t worry, I know it’s more than that! It controls the graphics aspect of the PC. It was heavily packaged with multiple layers of plastic and cardboard.

Next, I had to place the video card not flat, but straight up. This was a little awkward and hard to place, but eventually I managed to fit it in.

After that, I had to physically bend a part of the vent into the video card to get it to stay in place. It was really hard to bend it, but I have to admit, it was a lot easier than I thought. Then I had to screw the other part of the vent back on. Confusing.

But all that was easy as pi compared to what came next: the WIRES. As I mentioned before, there were heaps, mounds, and piles of wires. I had no idea where to connect each of them, so I consulted the manual.

Luckily, there was a very, very, VERY easy-to-understand page in the manual. Super easy to understand. (If you can’t see the sarcasm then you’ve misunderstood)
At least I vaguely knew where most of the cables had to be inserted. Slowly, from process of elimination and trial and error, I began to actually connect the wires to the right places.

The next thing I had to do was to connect the final cable that came out of the power supply to the monitor itself. Click!
Finally. I was done. After almost three hours of hard work BUILDING A WHOLE GAMING COMPUTER MYSELF, I was done. Or was I?

I pressed the power switch. I waited one second. Two seconds. Three seconds. Four, five, six, seven, eight, nine, ten. Nothing happened. (I forgot to take photos of the debugging process, sorry!)
Disappointed, I took a look at all the connectors to make sure that everything was in place. I unconnected and reconnected each of the long, tangly wires, just to make sure nothing was damaged.
As well as that, I decided to disconnect and reconnect the CPU. This process seems to be called “unseating”, so that’s what I did. I had to unlatch the gray wires, then I had to carefully remove and replace the delicate CPU. I made sure none of the sticky, gray gel came onto my hands.
Then, something sparked my mind. There was something that I was really confused about, and that was the memory, Maybe I had put the memory sticks in the wrong slots? I didn’t know (and I still don’t). And I know that I should have tested out the connections and the CPU before I had tested the memory sticks, but I didn’t. Instead, I experimented with the memory.
Before, I had placed the memory sticks in the A1 and B1 slots. However, maybe I was supposed to place them in the A1 and A2 ones? That’s exactly what I decided to do.
After that, I pressed the power switch and waited another ten long seconds. Nothing happened. Again. But this time, though, the PC actually TURNED ON. The colourful fans were running at top speed (actually fan, singular, because only one fan was working) and I could see some tiny red lights inside the PC. I had no idea if the lights were a good sign or a bad one, so I decided to check.

Apparently, the red light that was on was the VGA. I had no idea what VGA was, but I knew that I had heard of it somewhere. After a few moments, I realized what it was. While I was connecting the cables, I had seen a socket labeled VGA, where I plugged in the corresponding cable. This was connected to the video card, which explained what VGA stood for: Video Graphics Array. However, this cable actually wasn’t properly connected to my monitor, so I had to plug it in, and that was the source of the problem.

Soon afterwards, I powered on the PC, and sure enough, I waited five seconds. And then, the screen actually ILLUMINATED! It felt like fireworks of fondness inside me, because the computer that I MYSELF had built, was turning on. The hours of hard work that I had put into that project had all paid off. And it was finally done. The first thought that came to my mind after I was done was “This would make an AMAZING CookyLela News article with lots of views!”.
However, as I examined the computer, I got more and more confused. You see, the first thing that caught my eye was the fans. As I said before, only one of the fans was working. I thought that fixing all the connections would help, as maybe the rest of the fans were not connected properly.
But the fans weren’t my first priority at the time. Because according to the class that I had took, that wasn’t exactly supposed to happen… After reading further online, I found what I was supposed to do. I had to install the Windows operating system onto a USB drive, then I had to plug it into the PC.
To do that, I had to use my dad’s Windows computer to install the operating system, since I didn’t own any Windows devices. I plugged in the thumb drive, installed the operating system, which took a couple minutes, and I unplugged it. Then, I replugged it into the USB slot of the PC.
This time, when I powered on the computer, something actually happened. The same reddish-orange screen popped up, but this time, I had the option to boot it.

Once it had finished booting, I had to set up a few settings. I first had to choose my region and language, then I could press the “Install now” button.
There was a “setup starting” screen, then I had to fill in some of my general information, such as my name and the WiFi password.

I was greeted with a “getting ready” screen, then one that said “now we have some important setup to do”. After a couple of seconds, I had to go through my least favorite part of building the PC: waiting for the system to install. The text that was displayed was “this might take several minutes, don’t turn off your PC”.
As soon as that screen disappeared, I jumped up from my seat. Everything was done. All the hard work from 3:21 to 9:46 PM on March 2 was worth it. I had finished building my gaming PC (And I had finished writing my gaming PC article, from 7:20 PM on April 9 to 6:56 PM on May 23).
I installed Google Chrome, Discord, Antidote, IDLE for Python, Minecraft, Microsoft Word, and a bunch of other essential apps that I use on a day-to-day basis. I logged in to them just to set up everything.
And then, I went onto Discord to text a few of my friends about what I had done. I know, I know, I wasn’t supposed to, since it was a “no tech” day (the irony!) but I just had to. I mean, I don’t think I’ll be punished for something I did three months ago, right? Right?
Anyway, then, once and for all, I was done. I was 100 percent done.
Or was I?
*Here are some photos of the PC*


*A few weeks later*
On a sunny Sunday afternoon in the middle of April, I powered on my PC. However, this time, nothing happened. Well, actually, one thing did. After five seconds of a blank screen, the familiar red-orange screen popped up. Three words were prominently displayed in the middle of the screen: Failed To Boot.
I was really, really, REALLY confused. I had a lot of questions about the situation. Firstly, why did my PC act up so randomly? Secondly, why were the fans running so fast? Thirdly, which of the proposed options was I supposed to choose: Reboot, or Boot?
I’m not going to lie here, I had absolutely no idea what to do. I may or may not have panicked just a tiny bit, and I may or may not have chosen a random option. The option that I did choose was Boot, and lucky for me, that was the correct one. Everything from then on acted just as normal. However, my head was still brimming with questions that, one month later, I still can’t answer.
*One or two weeks later*
This time, again, I was preparing to play a little bit of Bed Wars in Minecraft. However, when I powered up my computer, nothing happened. This time, I was telling the truth. Nothing at all happened. I was faced with a blank computer screen.
Again, I may or may not have panicked. How random were these malfunctions going to happen? I literally could do nothing. But one thing I could do was look at the PC. Inside it, I could see a familiar red light that illuminated the dark box.

This time, it was the CPU light that was on. Uh-oh, I thought to myself. This did not look good. I may or may not have started to panic even more. I hesitantly pressed the power button to try to turn it off, but it was no use. Nothing happened. I was still faced with the same blank screen and hi-speed fans.
Eventually, it occurred to me to long press on the power button. After five long seconds, the PC finally turned off. I pressed the button once more, and the PC powered on like nothing had happened.
I was pretty mystified by these two encounters, but nothing has happened since April, so I don’t think there’s any more reasons to panic.
So yeah! I guess this is the end of my article… I’ve spent almost one whole month writing this article, which has totaled to 15 pages and 4645 words. However, this being the end of my article does not mean that this is the end of my PC journey. I’ll soon be posting a part 2 (!!!!) that will be talking a bit more about the setup, the gaming, and the specs, for anyone who is interested. If I have any more updates to share, or any theories that I have about the malfunctions, I’ll be sure to post them in a part 3 (!!!!!!!!!!!!!). If you have any feedback for this article, please make sure to tell me in the comments. I’d really appreciate it, since this is my first PC. If you made it all the way to the end, thank you so, so, SO MUCH for reading. I’m really grateful for all the readers that managed to endure my 5000-word article, which is the longest CLN article yet! So… I guess… yeah. Thank you for reading!
~Lela S.


I feel so bad for you! First of all, you bought a gt1030 and 32gb of ram, that graphics card is so underpowered compared to some of the other specs in this computer. You put the two ram sticks directly next to each other, defeating the purpose of having two sticks, you built so much of this computer wrong. If you haven't changed it at all, take it all apart and restart with a good tutorial, from Bitwit or some other good youtuber. (A quick Google Search tells me the proper ram slots are 2 and 4, but check the manual.)
Excellent article. Congratulations on building your first computer!
Amazing! Can you build me one? Lol 😂